In a basic three system SAP landscape, roles are first created in Development System and then transported to Production system (after testing in Development and Quality systems). In this topic we will be discussing about two points – (1) How to create a Role Transport and (2) How to Transport Roles in SAP.
Role Transport can be created via Tcode PFCG. For creating a role transport, go to PFCG -> Utilities -> Mass Transport
Give all the role names in the “Selection of Roles” field. Based on the requirement, we may need to create role transport for one role or many roles. Paste the role names (marked as 1 in the figure below) as shown in the figure below and execute (marked as 2 in the figure below):

You will get the below screen:
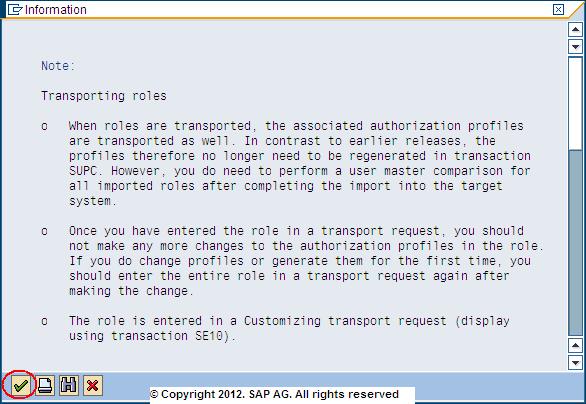
As we can see in the above figure, there are two check boxes. The second check box is for transporting generated profiles along with roles. This option should be selected since it is not a good practice to manually generate roles in quality and production systems. Click execute. We get the following dialog box. Click the tick mark as shown below:
Next, we get a small dialog box called “Choose objects”. It asks to select the objects which can be used for transporting the role – User Assignment and Personalization. We generally select only Personalization as it is not a good practice to transport the user assignment to Quality and Production systems. Select Personalization and click tick mark to proceed.
The system prompts for a creating a Customizing Request as shown in the figure below. Since roles are client specific data, the request type is Customizing Request.
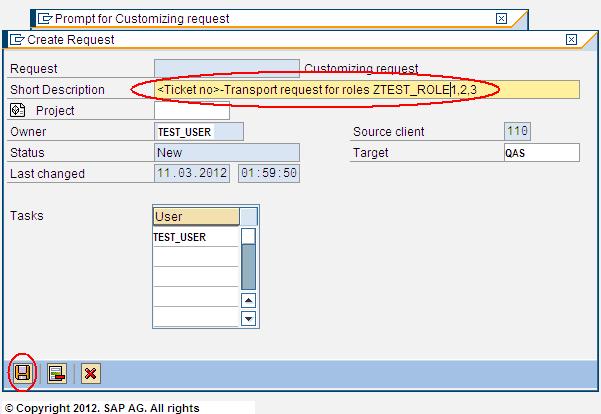
Click on “Create Request” as shown in the above figure. We get a dialog box to Create Request as shown in the figure below:
Give the Short Description as shown above. We have given “<Ticket no>-Transport request for roles ZTEST_ROLE1,2,3”. Click on Save. System prompts with a dialog box for Customizing Request as shown below:
As shown in the figure above, the Request No will be of the format <SID>K9<5digit number>. For example-if the development system id is DEV. Then transport request will be something like DEVK9<5 digit number> where <5 digit number> means any 5 digit number. Every request will have a different 5 digit number and the number will keep increasing with each new request. Click the Tick mark as shown above.
This process creates the transport request. Now lets see the procedure to release the transport from Development system so that it can be imported to Quality and later to Production.
For releasing a transport request, we can use either of the three tcodes – SE01, SE09 or SE10. Lets execute SE10 tcode. We get the following screen:
Since roles are client specific data, the transport request for roles would be “Customizing Requests”. And since we have just created the role transport, Request Status (as shown in the figure above) will be “Modifiable”. Click on Display Button. We get the following screen:

We can see the transport request which we just created in the figure above. Every transport request has at least one task. For releasing the transport request, first of all, all the accompanying tasks are released. This is done by selecting the task and clicking on the truck shaped Transport Button as shown above. Once all the tasks have been released, we need to release the Request.
This process completes the Role transport creation process and release of transport request. The import of transport request is a BASIS task and should be handled by a BASIS Administrator.
We are still giving an overview of how this process can be handled in case BASIS and Security both are being handled by the same administrator.
Follow following procedures for importing requests to another system :
- Login to the target system where the request needs to be imported. As a normal practice, requests are transported first to Quality System (QAS) from Development System (DEV). So for importing the changes made in Development to Quality, login to Quality (QAS) system.
- Execute tcodeSTMS. This takes to “Transport Management System” Screen.
- Click on the “Truck” icon (at the extreme left) or press F5 (Import Overview).
- This screen (Import Overview screen) shows Number of import queues in the system. Select the system (QAS here) from the queue and click “specs” icon (Display Import Queue) or press F8.
- This screen shows the list of all requests. Select the request which need to be imported and click on the Grey colored truck icon (Import Request) or press F8.
- It will pop up a dialog window. Select the necessary options from the window and click the Tick Mark. Import will begin.


