We have already discussed how to create mass users using SECATT. This is one of those issues which Security Consultants always face during their day to day security activities.
In this section, we are going to discuss on How to do Mass user to Role assignment using SECATT.
It will not be a very tough task if all the users have to be assigned the same roles, which we can easily do using SU10 tcode.
But what if mass users have to be assigned different roles?
We can use SECATT script for this purpose.
But the main question is – Can we use SU01 tcode for this script? The answer is a BIG NO.
We know that SECATT Scripts are screen dependent and it follows the same steps and inserts data at the same place where we insert during recording of the scripts. Hence, if we use SU01 for role assignment to users, SECATT will try to insert the role at the same position again and again and hence it will fail.
Then what is the solution?
The solution is using SU10 tcode instead of SU01.
Lets start with SECATT for mass user to role assignment task.
(1) Step 1 – Recording the Tcode Execution
Lets name the script as Z_MASS_USER_ROLE_ASSIGNMENT and click create.
- Enter the title as “Mass User to Role Assignment”
- Enter Component as “BC-SEC-USR-ADM”
- Click Save
- Click Pattern as shown in the figure below
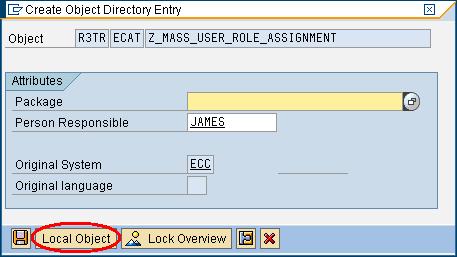
The system will then prompt “Create Object Directory Entry Box”. Select Local Object.
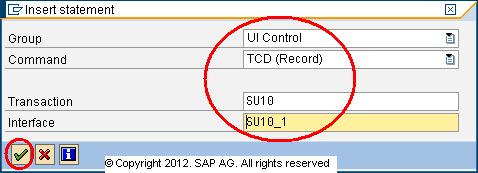
- Now in Insert Statement Dialog window, select UI Control for Group.
- Select TCD (Record) for Command.
- Select SU10 for Transaction. Press Enter. The Interface will get populated automatically with SU10_1.
- Click Continue check mark.
From this step onwards every step is recorded. So we need to be a little careful not to click any option which is not required.
Clicking the continue check mark takes to the User Maintenance (SU10) screen. Follow the steps for assigning a role to a user id and click Save.
Lets take the example of a user – ZTEST and assign a role using SU10 as shown below:
- Execute tcode SU10. Gve user id ZTEST and click “change”
- In the next screen, go to “Roles” tab. Select the “Add” radio button.
- Add a role and role validity
- Click save
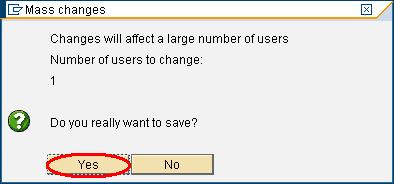
Once the user id to role assignment process is over and we have clicked the save button, its time to end the recording. To end the recording, click the ![]() button in SU10 screen. You will be prompted with the “Recording Ended” dialog window. Click “Yes” as shown below:
button in SU10 screen. You will be prompted with the “Recording Ended” dialog window. Click “Yes” as shown below:
- In the next screen, Click Save to save the recorded test script.
(2) Step 2 – Creating the Parameters
As already discussed during the earlier discussion on SECATT, the next step after “Recording of tcode execution” is Creating the Parameters. Here, the VALINS (Values that were entered during the recording) are converted to Parameter Values. Lets see how this is done.
- Double click the interface value SU10_1.
- After we double click the above mentioned interface, we get “Command Interface” on the right side. In the command interface, there is an option DYNPRO MODE
 . Expand this Dynpro Mode by clicking on the arrow on its left.
 - On expanding the dynpro mode, we get various sets of screens numbered [1], [2], [3] etc. Expand the 1st [1] set of screen.
- Double click on FIELD MODE (as shown in the figure below)
- On the right side of the screen, we get certain values for interface SU10_1. Double click on the value that was entered during user to role assignment. For example, we had used user id as ZTEST. Double click on the value (ZTEST here).
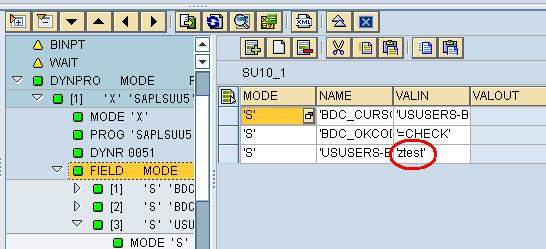
Double click the VALIN (ZTEST) until we get a blank area with VALIN as shown in the figure below:
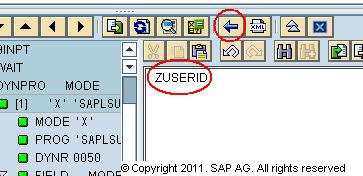
Change ‘ZTEST’ to ZUSERID and click Back button as shown below:
System will prompt with a Parameter Maintenance dialog window. Select Import and click Yes as shown below:

Repeat the same steps for parameter creation for all the values that were entered during recording. Once all the parameters are created, click Save button.
(3) STEP 3 – Creating Test Configuration
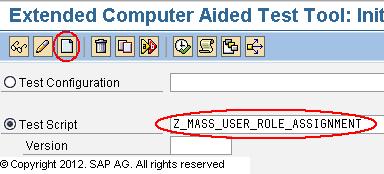
- Enter Test Configuration Name and click create icon as shown below:
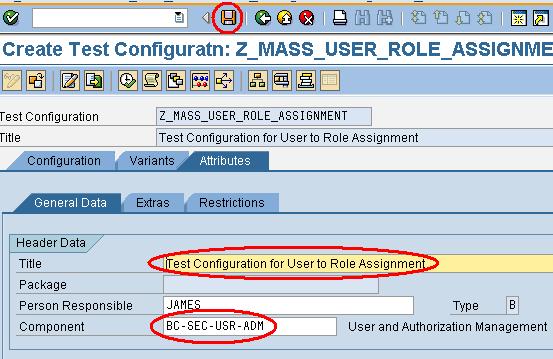
- Enter Description of the Test Configuration (Here we have entered configuration as “Test Configuration for User to Role Assignment”)
- Enter Component as “BC-SEC-USR-ADM”. Click Save.
- System will prompt with “Create Object Directory Entry” Dialog window. Click Local Object.
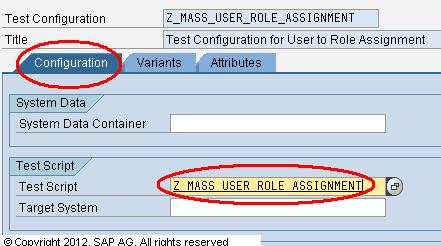
- Now select “Configuration” tab.
- In the “Test Script” text box, enter the Test script name that we had created in the Step 1. (We had created Test Script Z_MASS_USER_ROLE_ASSIGNMENT)
- Select Utilities -> Settings
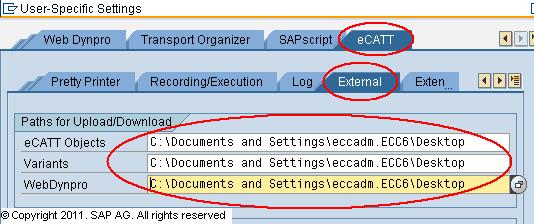
- Now select eCATT tab and then External tab
- Also set the path for eCATT Objects, Variants and WebDynpro. We have set the path to Desktop as shown in the figure below:
- Click Continue check mark
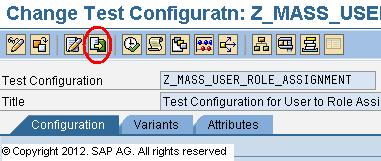
- Now download variants using “Download Variants” button as shown below:
- By default it will be downloaded to Desktop as we had set the path for variant download as Desktop in our previous step.
- The system will prompt with “Download Variant Data” dialog box. Click Yes:
(4) Step 4 – Updating and Uploading the Variant file
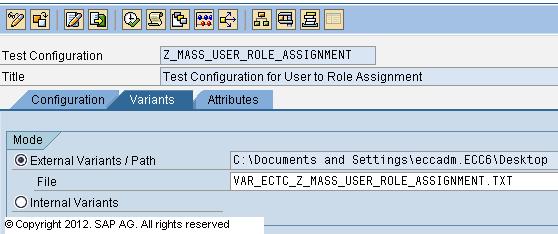
The variant file (VAR_ECTC_Z_MASS_USER_ROLE_ASSIGNMENT.TXT) gets downloaded to the desktop.
The file is in .txt format. The values present in this file should not be modified. For mass users to role assignment, we need to update this file with the list of users and roles which need to be assigned. The best way to do that is to open this file in .xls format as already discussed earlier (right click on the file and open with Microsoft excel).
Now update this file with the list of mass roles which need to be assigned to mass users.
Save the file and make sure that we use it in .txt format in SAP since the script reads .txt format.
- Click Variants tab and select External Variants/Path. Select the Variant file and click execute.
Make sure that the variant file is not open while execution. When system prompts to save the configuration, save it.
Execute the File. Mass users to Role Assignment process starts and ends with a log file.
Please Note : Due to Technical changes into SU01/SU10, SECATT no longer works for SU01/SU10 post Netweaver Release 7.3. Please refer to SAP Note 1864062 for more details.
